 Reviews

 Proudly American

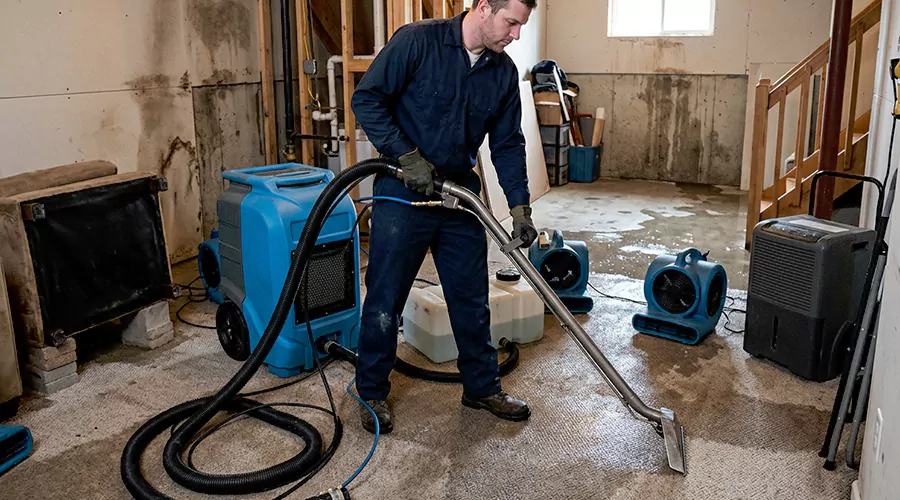
Water mitigation is the immediate work done after a leak or flood to stop water from spreading and reduce further property damage. In 2026, basic mitigation can average around $600, while larger water-damage projects can cost several thousand dollars once drying or repairs are included.
Mitigation normally starts before permanent repairs. The goal is to remove water and identify hidden moisture before floors or walls suffer more damage.
Speed matters because wet building materials can support mold growth if they remain damp. Drying should generally begin within 24 to 48 hours whenever conditions allow.
What Does Water Mitigation Mean?
Water mitigation means taking immediate steps to limit the amount of damage caused by unwanted water. The work focuses on stopping the source and extracting standing water. It also includes drying wet materials and monitoring moisture. Permanent rebuilding normally happens after the property has been stabilized.
A typical response can include:
- Find and stop the water source.
- Check the affected area for safety hazards.
- Document visible damage.
- Remove standing water.
- Identify how far moisture has traveled.
- Move or protect salvageable belongings.
- Remove materials that cannot be dried.
- Set up drying equipment.
- Monitor moisture during the drying period.
- Confirm that affected materials are dry enough for the next stage.
Water damage mitigation doesn't automatically mean repairing drywall or replacing flooring. Those tasks often happen later after the structure has been dried.
The main purpose is damage control. A successful response prevents a manageable water loss from spreading into a much larger part of the building.
When Is Water Mitigation Needed?
Mitigation is needed when water has moved beyond a small surface spill and begun affecting absorbent materials or hidden spaces. A broken pipe can require immediate action if water reaches flooring or drywall. Floodwater and sewage also need rapid attention because contamination changes the safety requirements.
Common situations include:
- A pipe bursts inside a wall.
- A water heater releases water across a room.
- An appliance hose fails.
- A toilet overflows.
- Roof damage allows rain indoors.
- Water enters a basement after heavy rainfall.
- A sump pump stops working.
- A ceiling leak spreads into insulation.
- Carpet becomes saturated after a plumbing leak.
- Outdoor floodwater enters the building.
Emergency water mitigation is especially important when standing water continues spreading. Waiting several hours can allow moisture to move below flooring or into adjoining rooms.
A small clean-water spill on tile may only require normal cleanup. The need for mitigation increases when water enters porous materials that cannot be dried quickly with towels alone.
What Happens During the Water Mitigation Process?
The process starts with controlling the source and determining where the water has traveled. Standing water is then extracted before controlled drying begins. Materials that cannot be safely dried may be removed. Moisture checks continue until the affected structure reaches a suitable dry condition.
Step 1: Stop the Source
The first task is stopping additional water from entering the property. A supply valve may need to be closed after a plumbing failure.
Other situations require a different correction. A roof leak needs weather protection while groundwater may require drainage or pumping.
Mitigation cannot succeed while the original source continues adding moisture.
Step 2: Check for Immediate Hazards
Standing water can create electrical risk. Floodwater can also carry contamination that isn't visible.
Do not enter standing water to reach an electrical panel. Power should only be switched off from a dry and safe location.
Other warning signs include:
- Sagging ceilings
- Wet electrical outlets
- Strong gas odors
- Unstable flooring
- Sewage contamination
- Visible structural movement
Safety comes before extraction. A fast response doesn't mean entering an unsafe area.
Step 3: Document the Damage
Photographs can record the condition of the property before water is removed. Take wide room photos and closer images of affected materials when it is safe.
Useful documentation can include:
- The suspected source of the water
- Standing water levels
- Damaged flooring
- Wet walls or ceilings
- Affected furniture
- Items that may need disposal
Documentation can also help track how the damage changed during drying.
Step 4: Extract Standing Water
Water extraction removes the largest amount of moisture before detailed drying begins. Pumps or wet extraction equipment can reduce how much water remains available to soak into building materials.
Extraction can be especially important for:
- Saturated carpet
- Flooded basements
- Large hard-floor areas
- Water beneath furniture
- Multiple connected rooms
The faster bulk water is removed, the less moisture remains for building materials to absorb.
Step 5: Measure Moisture Beyond the Visible Area
Water often travels farther than the edge of the visible puddle. It can move beneath baseboards or into drywall through capillary action.
Water mitigation moisture readings help show which materials are still wet. Comparing affected materials with similar dry areas can also help establish drying progress.
Common areas that deserve checking include:
- Drywall near the floor
- Carpet padding
- Subfloors
- Cabinets
- Wall cavities
- Wood framing
- Ceilings below an upstairs leak
A surface can look dry before deeper materials have released their moisture.
Step 6: Remove Materials That Cannot Be Saved
Some materials can remain in place if they dry promptly and retain their physical condition. Others may need removal when they are saturated or contaminated.
Materials more likely to require removal include:
- Swollen drywall
- Saturated insulation
- Waterlogged particleboard
- Contaminated carpet padding
- Damaged ceiling tiles
- Porous materials exposed to sewage
Removing damaged material can expose hidden areas that need drying.
The decision shouldn't be based only on appearance. Contamination and structural condition matter as much as visible staining.
Step 7: Begin Structural Drying
After extraction, the remaining moisture must leave the building materials. Air movement can increase evaporation while dehumidification removes that moisture from the surrounding air.
Structural drying may use:
- Air movers
- Dehumidifiers
- Controlled ventilation
- Moisture meters
- Specialized drying equipment
Household fans can help with a very small clean-water loss. Larger wet areas often require greater airflow and moisture removal capacity.
The EPA advises drying water-damaged materials within 24 to 48 hours when possible. Faster drying lowers the chance that a water problem turns into a mold problem.
What Is the Difference Between Water Mitigation and Restoration?
Water mitigation stops additional damage while restoration repairs what has already been damaged. Mitigation normally happens first because wet materials must be stabilized before rebuilding begins. Restoration can include new drywall or flooring. Both phases may be necessary after a major water loss.
The difference is easier to see side by side.
| Factor | Mitigation | Restoration |
|---|---|---|
| Main goal | Stop additional damage | Repair existing damage |
| Timing | Immediately after the loss | After drying |
| Water extraction | Usually included | Usually already completed |
| Structural drying | Main part of the work | Completed before repairs |
| Moisture monitoring | Common | Less central |
| Damaged material removal | When necessary | Replacement follows later |
| Drywall installation | Usually not included | Often included |
| Flooring replacement | Usually not included | Often included |
| Painting and finish work | Not the main goal | Common |
| Final result | Dry and stabilized property | Repaired property |
Water mitigation and restoration can occur during the same overall project. However, they solve different problems.
Mitigation answers the question, "How do we stop this from getting worse?" Restoration answers, "How do we repair what was damaged?"
How Quickly Should Mitigation Start?
Mitigation should begin as soon as the source can be controlled and the affected area is safe. Standing water continues moving into porous materials while it remains in place. The first several hours can affect how much flooring or drywall eventually requires removal.
A general timeline looks like this:
| Time After Water Loss | What Can Happen |
|---|---|
| First few hours | Water spreads into nearby porous materials |
| First 24 hours | Flooring or drywall may begin changing condition |
| 24 to 48 hours | Mold risk increases if materials remain damp |
| Several days | Odor or swelling may become more noticeable |
| Longer delays | Hidden damage can become harder to dry |
The 24 to 48 hour period is a useful target rather than a guarantee. Some materials can develop problems sooner based on temperature or contamination.
Water loss mitigation works best when extraction starts before moisture has time to spread through several layers of the building.
Does a Flood Require Different Mitigation Than a Clean-Water Leak?
Yes. Water from a sanitary plumbing line is handled differently from sewage or outdoor floodwater. Floodwater can contain bacteria and other contaminants. The source determines what protective measures are needed and which materials can safely remain in the property after exposure.
Water losses are commonly described using three contamination categories.
Category 1 Water
Category 1 begins from a sanitary source. A broken cold-water supply line is a common example.
Fast drying can sometimes save drywall or flooring when exposure is limited.
Clean water should still be removed quickly. It can cause serious material damage even without heavy contamination.
Category 2 Water
Category 2 contains more contamination than clean water. Certain appliance discharges can fall into this category depending on the contents and circumstances.
Porous materials need closer evaluation. Normal household cleanup may not be suitable when a large area is affected.
Category 3 Water
Category 3 water is heavily contaminated. Sewage backups and some outdoor flooding fall into this higher-risk group.
Category 3 water mitigation requires greater control over contaminated materials. Porous materials exposed to this water are much less likely to be treated like materials affected by a clean supply-line leak.
Outdoor floodwater should always be approached carefully. You can't tell what contaminants are present by looking at the water.
What Happens During Basement Water Mitigation?
Basement water mitigation starts by determining whether the water came from plumbing or groundwater. Standing water is removed after electrical conditions are safe. Flooring or walls are then checked for hidden saturation. Drying continues while the original entry point is identified and corrected.
Basement losses can become complicated because water may reach:
- Carpet padding
- Finished drywall
- Insulation
- Stored belongings
- Wood framing
- Subfloor materials
Water can also enter through foundation openings after heavy rainfall. A failed sump pump is another common cause of basement flooding.
The cleanup is not finished when the floor puddle disappears. Lower sections of finished walls may remain wet after standing water has been removed.
How Much Does Water Mitigation Cost in 2026?
Water mitigation cost depends on the size of the affected area and the amount of extraction required. Angi's 2026 comparison places basic mitigation around $600 on average. Larger losses cost more once several rooms require drying. Contamination or material removal can increase the final amount further.
Full water-damage projects provide additional cost context. In 2026, national restoration costs commonly range from about $450 to $16,000 with an average near $3,868.
Water category also affects the overall cleanup and repair cost.
| Water Type | Typical 2026 Water-Damage Cost |
|---|---|
| Clean water | About $3.50 per sq. ft. |
| Gray water | About $5.25 per sq. ft. |
| Black water | About $7.50 per sq. ft. |
Water damage mitigation cost can increase when water reaches several building layers. A small visible area may require more work if moisture traveled beneath flooring.
Other factors that affect price include:
- Amount of standing water
- Total affected square footage
- Water contamination level
- Number of drying days
- Type of wet materials
- Amount of material removal
- Access to hidden wet areas
- Need for specialized drying equipment
The cost of mitigation and the cost of reconstruction should be viewed separately. A dry unfinished room may still need flooring or drywall replacement afterward.
Can You Do Water Mitigation Yourself?
A homeowner may handle a very small clean-water spill when the source is stopped and electricity is safe. DIY work becomes less appropriate when water reaches hidden spaces or several rooms. Floodwater and sewage also create contamination concerns that go beyond ordinary household cleanup.
For a minor clean-water problem, you can:
- Stop the source when safe.
- Photograph the damage.
- Move dry belongings away.
- Remove a small amount of standing water.
- Lift removable rugs.
- Use a dehumidifier.
- Check carpet padding.
- Monitor the area for returning moisture.
Do not use a normal household vacuum to collect water. Use only equipment designed for wet extraction.
Fans also shouldn't be used blindly after contaminated flooding. Moving air can spread particles when the water source isn't sanitary.
A simple DIY test is to compare the affected area with a similar dry material elsewhere in the house. Persistent softness or swelling can indicate that the area needs closer evaluation.
When Should You Call a Professional?
Professional help is appropriate when the loss is large or contaminated water is involved. Hidden moisture can also justify specialized testing because the visible surface may not show the full wet area. Electrical hazards or structural movement are clear reasons to stop DIY work.
Consider professional water damage mitigation services when:
- Several rooms are wet.
- Water entered wall cavities.
- Carpet padding is saturated.
- Hardwood flooring begins buckling.
- Insulation is wet.
- A ceiling begins sagging.
- Sewage entered the property.
- Outdoor floodwater entered the building.
- Electrical outlets became wet.
- Moisture remains after active drying.
- A musty odor develops.
- The water source cannot be identified.
Water mitigation emergency services can bring higher-capacity extraction equipment to a large loss. Commercial dehumidifiers can also remove far more moisture than many household units.
A water mitigation contractor can document where moisture has traveled before material removal begins. That information can help avoid rebuilding over areas that are still wet.
How Does Mitigation Help Prevent Mold?
Water and mold mitigation are closely connected because mold needs moisture to grow. Fast water removal reduces the amount of time building materials remain damp. Drying hidden spaces matters just as much as drying visible surfaces. Mold can develop behind walls even when the room looks normal.
To reduce the risk after a leak:
- Dry wet areas within 24 to 48 hours when possible.
- Keep indoor humidity below 60 percent.
- Check beneath carpet and flooring.
- Remove materials that cannot dry fully.
- Repair the original water source.
- Investigate musty odors.
- Watch repaired areas for returning stains.
- Keep airflow around damp materials.
Indoor humidity between about 30 and 50 percent is preferable when practical.
Moisture control remains the key step. Cleaning a visible stain without correcting hidden dampness doesn't solve the underlying condition.
How Can You Reduce the Risk of Another Water Loss?
Preventing another loss starts with checking the systems that commonly release or admit water. Plumbing connections deserve routine attention while roof drainage should direct rain away from the structure. Areas that have leaked before should be inspected more frequently for early warning signs.
A practical routine includes:
- Check exposed plumbing each month.
- Inspect appliance supply hoses several times a year.
- Look around the water heater for moisture.
- Test the sump pump before heavy rain.
- Clean gutters when drainage slows.
- Direct downspouts away from the foundation.
- Check ceilings after severe storms.
- Watch basement walls after prolonged rainfall.
- Investigate unexplained damp odors.
- Recheck previously repaired areas.
Commercial water mitigation can become much more disruptive when a leak affects occupied business space. Routine plumbing inspections can reduce the chance that a small failure spreads through several rooms before anyone notices.
Early detection doesn't prevent every water emergency. It can reduce how far many leaks travel before the source is found.
Conclusion
Water mitigation is the immediate damage-control phase after a leak or flood. The work removes water and dries affected materials before permanent repairs begin. Fast action can reduce the amount of flooring or drywall that must be replaced later. Contaminated water and hidden moisture deserve greater caution. This week, check plumbing connections and basement drainage for signs of moisture before a small problem spreads.
Frequently Asked Questions
Does water mitigation include replacing drywall?
Mitigation may include removing drywall that cannot be dried. Installing new drywall usually happens during the later restoration or reconstruction phase.
How long does water mitigation take?
Many drying projects take several days. The actual time depends on how much water entered the property and which materials became wet.
Is water mitigation needed after a small leak?
Not always. A small clean-water spill on a nonporous surface may only need normal cleanup if it is removed quickly and doesn't spread into other materials.
Can water mitigation prevent mold?
Fast extraction and drying can greatly reduce the conditions that support mold growth. Wet materials should generally be dried within 24 to 48 hours when possible.
Does mitigation come before restoration?
Yes. Mitigation normally comes first because water must be controlled and the structure dried before damaged finishes are rebuilt.
What is the goal of water mitigation?
The goal is to stop further damage rather than complete every repair. Mitigation leaves the affected area dry and stable enough for restoration when repairs are still needed.